Nikita S. · Senior Frontend Engineer / Frontend Lead
Building Complex Frontend Systems for Fintech, Banking, B2B, and Web3
I specialize in building scalable architectures and transaction-heavy product interfaces. I focus on end-to-end feature ownership, reliable data flows, and turning complex business requirements into intuitive web applications.
Angular·TypeScript·Fintech Platforms·Web3 Ecosystems·Product Engineering
What I Do
My core focus areas across product delivery and technical strategy.
Product Engineering
Driving features from vague concepts to production. I align cross-functional teams, clarify requirements, and take full ownership of delivery.
Scalable Architecture
Building modular frontend foundations with clear boundaries. Designed to keep codebases clean and maintainable as products and teams grow.
Enterprise-Grade Interfaces
Handling high-density data, multi-step workflows, and strict business rules. I translate heavy operational requirements into secure, performant, and intuitive product surfaces.
Reusable Systems
Building architectural leverage for the entire team. I design reusable system foundations from shared product logic to consistent design patterns that multiply development speed and keep the product cohesive as it scales.
End-to-End Integration
Working across frontend and API boundaries to translate complex business rules into seamless interfaces. I shape data models and manage application states to ensure reliable product experiences.
Technical Demos
Live environments demonstrating code structure, Web3 mechanics, and Enterprise UI capabilities.
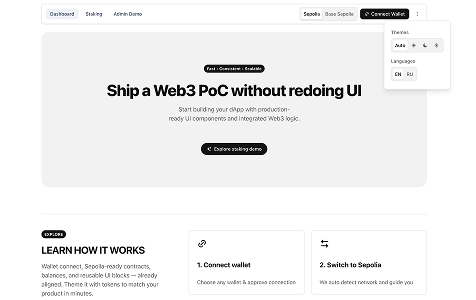
Hybrid Web3 & Enterprise UI Showcase
Angular 21 demo combining transactional Web3 staking flows with data-heavy B2B admin interfaces.
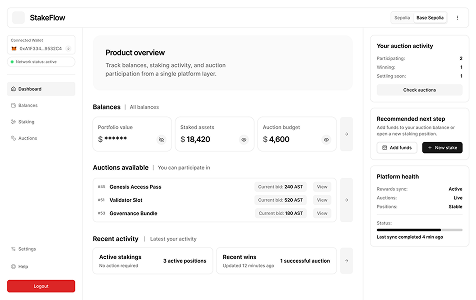
DeFi Wallet Tools
Angular/Web3 demo covering staking, auction, marketplace, and wallet-connected product flows.
Technical Areas
The technologies and architectural patterns I use to build scalable frontends.
Core
Angular
TypeScript
RxJS
Signals
SSR
React
Next.js
Node.js
Systems
Backend-For-Frontend
REST API
Ethers.js
Wagmi
WalletConnect
Smart Contract UI
UI & Architecture
Headless UI
a11y
ARIA
Component Systems
State Management
Featured Work
A selection of production-grade platforms delivered for enterprise banking and crypto businesses.
B2B KYB/KYC Onboarding Portal
Banking platform · Frontend delivery · 2025Role-based onboarding platform featuring automated identity verification, dynamic document uploads, and multi-user invitation flows.
iBanking Client Platform
Banking product · Frontend architecture · 2023High-load banking interface for corporate clients, focusing on account management, secure chats, and complex operational workflows.
Web3 Non-Custodial Extension
Wallet product · Frontend owner · 2023Browser-based crypto wallet featuring a custom QR-based connection model, cross-tab state syncing, and external dApp interaction APIs.
Internal Banking Admin Panel
Internal tool · Rapid delivery & modernization · 2025Operational dashboard for managing banking entities, accounts, permissions, and internal workflows.
Get In Touch
Open to relevant frontend roles, technical discussions, and selected product opportunities.
Direct contact
For senior frontend roles or relevant technical opportunities, email is the fastest option — or use the form.